Art Class Learning & Teaching Guide: Create, Then Capture
Project Title: More than just a BOX – Form, Light, and Perspective
Focus: Observational Drawing, Value Rendering, Collaborative Design
Level: Junior Secondary to IBDP Foundation Art Students
Project Overview
This project begins not with a pencil, but with a pair of scissors, or cutter. It guides students through the full journey of art-making: from the raw, physical act of creation to the nuanced, observant act of capture. Students collaboratively transform a simple cardboard box into a complex architectural subject, which then becomes the shared subject matter for a rigorous drawing exercise in light and form. It connects the joy of making with the discipline of seeing.
Learning Objectives
Knowledge & Understanding:
- The visual elements of form, shape, and tone.
- The principles of linear perspective.
- The behavior of light on a form (highlight, mid-tone, core shadow, reflected light, cast shadow).
Technical Skills:
- Precise cutting and folding (craftsmanship and tool safety).
- Blocking-in for proportion and perspective.
- Tonal gradation using techniques like hatching and cross-hatching.
- Observational drawing of complex forms and textures.
Generic Skills:
- Collaboration & Communication: Negotiating a shared artistic vision.
- Problem-Solving: Overcoming structural and perspective challenges.
- Critical Thinking: Analyzing light and form to make informed artistic choices.
Teaching Sequence & Instructions
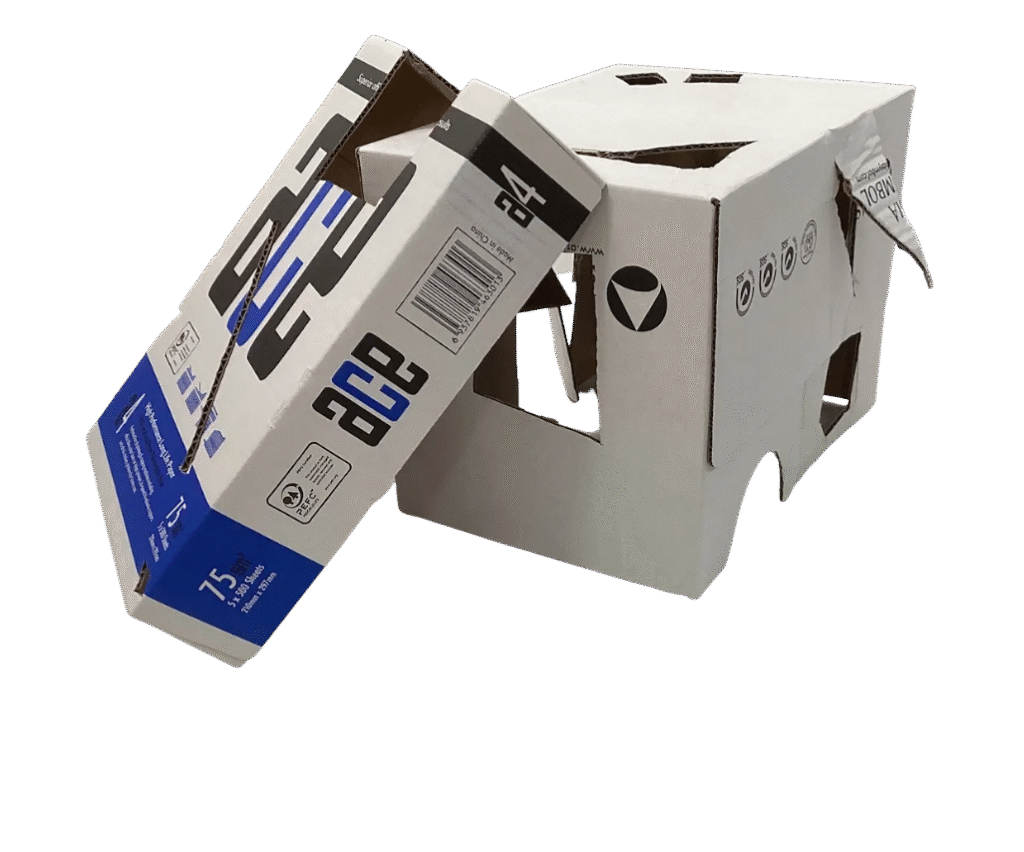
Phase 1: The Creative Act — Transformation with “Weapons”
- Activity: In small groups, students receive one cardboard box to alter collaboratively using tools like cutters and scissors.
- Engagement Insight: This hands-on phase is often the most enjoyable for students. The energy of using “creative weapons” to transform an everyday object fosters excitement and ownership.
- Teaching Tip: Emphasize that while creative messiness is allowed, the final transformed object will be their subject matter. This connects the acts of creation and observation meaningfully.
- Safety Note: Instruct students to use protective surfaces, cut away from their bodies, and handle tools responsibly.
Phase 2: Staging the Still Life
- Activity: Groups place their modified box on a large white paper “stage” and illuminate it with a single strong light source (e.g., a lamp) to enhance shadow definition.
- Teacher Tip: Encourage students to angle the light to maximize dramatic shadows and observe how the white paper reflects light onto the box.
Phase 3: The Observant Capture
- Activity: Each student selects a unique 360-degree viewpoint and creates a detailed tonal drawing of the box.
- Leveraging Prior Learning: Remind students to apply skills from previous exercises:
- Use tonal gradation strips as a value reference.
- Employ techniques like hatching and cross-hatching.
- Apply knowledge from basic form worksheets to break down complex shapes.
- Teacher Tip: Ask guiding questions during the process: Where is the lightest light? How does reflected light affect the shadows?
Why This Project Resonates
This project inverts the standard still-life process. Students create the very subject they draw, fostering deep ownership and engagement. This personal investment transforms the drawing phase from a technical task into a mission to represent their creation accurately. The tangible link between making and drawing sustains motivation from start to finish, illustrating art as an integrated cycle of creation, observation, and interpretation.
Assessment Criteria
| Criteria | Description |
| 1. Structural Accuracy & Perspective | The foundational drawing is spatially convincing. The perspective and proportions of the box’s structure, including all modifications (cuts, folds), are accurately rendered from the chosen viewpoint. |
| 2. Observation & Rendering of Light | Core Technical Skill. Demonstrated mastery in observing and depicting a full tonal range. Accuracy in rendering the core shadow, reflected light, and cast shadow with appropriate gradation. The light source appears consistent across the entire drawing. |
| 3. Artistic Interpretation & Detail | Your creative choices. This includes:• Composition: Effective and intentional use of the entire page. The chosen angle is dynamic and engaging.• Detail Handling: The thoughtful rendering of details such as text, symbols, tape, or cardboard texture.• Craftsmanship: The overall neatness, precision, and care evident in the final artwork. |
Differentiation & Teaching Tips
- For Less Experienced Students: Provide pre-drawn perspective grids. Simplify tonal analysis to focus on light, mid, and dark tones.
- For Advanced Students: Challenge them to incorporate negative space or experiment with mediums like charcoal. Encourage attention to subtle textural details.
- Group Dynamics: Assign roles (e.g., Designer, Cutter, Lead Drafter) to ensure equal participation.
- Example Work: Show previous student work highlighting the same box from different angles to illustrate goals and outcomes.
Fun Fact & Philosophical Note
Students often relish the transformation phase most—the chance to use tools and collaboratively “build” something unexpected. This energetic, slightly messy process is channeled purposefully: every cut they make is a line they will later draw. For young artists, this holistic experience—creating the world they study—bridges the roles of sculptor and draftsman, empowering them as full creators invested in their work from conception to completion.
This guide integrates creativity, technical skill, and reflective observation, making it an engaging and meaningful project for developing artists.
Idy NG